This Nextcloud installation guide describes the installation, configuration and hardening, monitoring as well as some extension options of Nextcloud on a 24.x LTS (x86-64) or Debian Server 12 (x86-64) server.
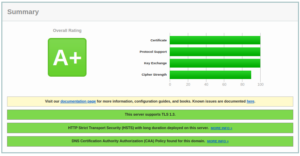
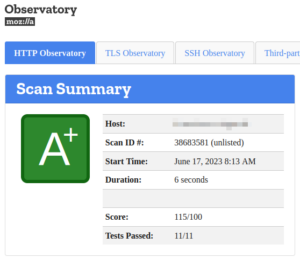
The installation is based on the components web server nginx, Let’s Encrypt TLS 1.3, MariaDB 10.11, PHP 8.3 (php-fpm), Redis, crowdsec, ufw, and Netdata, and finally receives an A+ security rating from both Nextcloud and Qualys SSL Labs.
The parameters to be adjusted are marked in red in the article and must be replaced with your specific system values (e.g. your.domain.de or 192.168.2.x).
Would you rather install everything with just a single script? Then use our Nextcloud installation script zero.sh, which is available here.
Further manufacturer information can be found here.
Current installation media for the underlying Linux server can be obtained here:
Ubuntu 24.04.x LTS:Requirements: Download Installation Medium
Debian 12.x: Voraussetzungen: Download Installation Medium
Start the installation and connect to your server via SSH console, e.g.
ssh <user>@<IP-address>
Only Debian Server:
su - apt install -y sudo usermod -aG sudo <Your current user> exit
From here on, it continues again for both server operating systems (Ubuntu and Debian):
Switch to privileged user mode
sudo -s
and first update the system.
apt update && apt upgrade -y
Prepare the server by installing the necessary base software packages:
apt install -y
apt-transport-https bash-completion bzip2 ca-certificates cron curl dialog
dirmngr ffmpeg ghostscript git gpg gnupg gnupg2 htop jq libfile-fcntllock-perl
libfontconfig1 libfuse2 locate lsb-release net-tools rsyslog screen smbclient
socat software-properties-common ssl-cert tree unzip vim wget zip
Enter the future server name in both the hosts file and the hostname file (» codeberg: https://codeberg.org/criegerde/nextcloud/src/branch/master/etc/hosts):
nano /etc/hosts
Adjust the red values to your environment, in the example we assume that the domain is called "your.domain.de":
127.0.0.1 localhost 127.0.1.1 their their.domain.de ::1 their their.domain.de ip6-localhost ip6-loopback [...]
Enter the correct server name in the hostname file and replace the red value with your:
nano /etc/hostname
The server name must be specified as FQDN, that is, fully qualified:
ihre.domain.de
Check if the time server service is configured with at least one endpoint.
nano /etc/systemd/timesyncd.conf
If the line NTP is commented out (#NTP=), remove the '#' character before NTP and add, for example, these two time servers:
NTP=ntp1.dismail.de ntp2.dismail.de
Save this file and restart the time server:
systemctl restart systemd-timesyncd
Now ensure that the server cannot switch to an "energy-saving mode":
systemctl mask sleep.target suspend.target hibernate.target hybrid-sleep.target
Finally, restart the server
reboot now
and then log in again to the server with privileged user rights:
sudo -s
Add more software repositories (software sources) to the system to be able to install the current releases of the respective packages.
Only Ubuntu Server (X86_64):
apt install -y curl gnupg2 ca-certificates lsb-release ubuntu-keyringcurl https://nginx.org/keys/nginx_signing.key | gpg --dearmor \ | sudo tee /usr/share/keyrings/nginx-archive-keyring.gpg >/dev/nullecho "deb [signed-by=/usr/share/keyrings/nginx-archive-keyring.gpg] \ http://nginx.org/packages/mainline/ubuntu `lsb_release -cs` nginx" \ | sudo tee /etc/apt/sources.list.d/nginx.listecho "deb [signed-by=/usr/share/keyrings/nginx-archive-keyring.gpg] \ http://nginx.org/packages/mainline/ubuntu `lsb_release -cs` nginx" \ | sudo tee /etc/apt/sources.list.d/nginx.listecho -e "Package: *\nPin: origin nginx.org\nPin: release o=nginx\nPin-Priority: 900\n" \ | sudo tee /etc/apt/preferences.d/99nginxadd-apt-repository -y ppa:ondrej/phpcurl "https://keyserver.ubuntu.com/pks/lookup?op=get&search=0xB8DC7E53946656EFBCE4C1DD71DAEAAB4AD4CAB6" \ | gpg --dearmor | sudo tee /usr/share/keyrings/ondrej-ubuntu-php.gpg >/dev/nullcat <<EOF > /etc/apt/sources.list.d/ondrej-ubuntu-php-noble.sourcesTypes: debURIs: https://ppa.launchpadcontent.net/ondrej/php/ubuntu/Suites: nobleComponents: mainSigned-By: /usr/share/keyrings/ondrej-ubuntu-php.gpgEOFcurl -o /usr/share/keyrings/mariadb-keyring.pgp 'https://mariadb.org/mariadb_release_signing_key.pgp'echo "deb [signed-by=/usr/share/keyrings/mariadb-keyring.pgp] https://mirror1.hs-esslingen.de/pub/Mirrors/mariadb/repo/10.11/ubuntu $(lsb_release -cs) main" \
| sudo tee /etc/apt/sources.list.d/mariadb.list
Only Debian Server (X86_64):
apt install -y curl gnupg2 ca-certificates lsb-release debian-archive-keyringcurl https://nginx.org/keys/nginx_signing.key | gpg --dearmor \ | sudo tee /usr/share/keyrings/nginx-archive-keyring.gpg >/dev/nullecho "deb [signed-by=/usr/share/keyrings/nginx-archive-keyring.gpg] \ http://nginx.org/packages/mainline/debian `lsb_release -cs` nginx" \ | sudo tee /etc/apt/sources.list.d/nginx.listecho -e "Package: *\nPin: origin nginx.org\nPin: release o=nginx\nPin-Priority: 900\n" \ | sudo tee /etc/apt/preferences.d/99nginxsh -c 'echo "deb [signed-by=/usr/share/keyrings/deb.sury.org-php.gpg] https://packages.sury.org/php/ $(lsb_release -sc) main" > /etc/apt/sources.list.d/php.list'curl -sSLo /usr/share/keyrings/deb.sury.org-php.gpg https://packages.sury.org/php/apt.gpgwget https://downloads.mariadb.com/MariaDB/mariadb_repo_setupchmod +x mariadb_repo_setup
./mariadb_repo_setup --mariadb-server-version="mariadb-10.11"
From here on, it continues again for both server operating systems (Ubuntu and Debian):
In order to read the added repositories and prepare the system with them, we update the system again and generate temporary "self-signed" certificates, which will later be replaced by full certificates from Let’s Encrypt.
apt update && make-ssl-cert generate-default-snakeoil -y
Now the preparations are completely finished and we can start with the installation of the web server nginx.
apt install -y nginx
We set the automatic start of the service as follows:
systemctl enable nginx.service
With a view to later adjustments, the standard configuration is secured and a new configuration file is opened (» codeberg: https://codeberg.org/criegerde/nextcloud/src/branch/master/etc/nginx/nginx.conf):
mv /etc/nginx/nginx.conf /etc/nginx/nginx.conf.bak touch /etc/nginx/nginx.conf && nano /etc/nginx/nginx.conf
Copy the entire following content into the file:
user www-data; worker_processes auto; pid /var/run/nginx.pid; events { worker_connections 2048; multi_accept on; use epoll; } http { log_format criegerde escape=json '{' "time_local":"$time_local", "remote_addr":"$remote_addr", "remote_user":"$remote_user", "request":"$request", "status": "$status", "body_bytes_sent":"$body_bytes_sent", "request_time":"$request_time", "http_referrer":"$http_referer", "http_user_agent":"$http_user_agent" }'; server_names_hash_bucket_size 64; access_log /var/log/nginx/access.log criegerde; error_log /var/log/nginx/error.log warn; set_real_ip_from 127.0.0.1; real_ip_header X-Forwarded-For; real_ip_recursive on; include /etc/nginx/mime.types; default_type application/octet-stream; sendfile on; send_timeout 3600; tcp_nopush on; tcp_nodelay on; open_file_cache max=500 inactive=10m; open_file_cache_errors on; keepalive_timeout 65; reset_timedout_connection on; server_tokens off; resolver 176.9.93.198 176.9.1.117 valid=30s; resolver_timeout 5s; include /etc/nginx/conf.d/*.conf; }
If you operate your Nextcloud behind a reverse proxy, replace the IP of the parameter "set_real_ip_from 127.0.0.1" with the IP of the reverse proxy ("set_real_ip_from w.x.y.z").
Save the file and close it to subsequently restart the web server:
systemctl restart nginx.service
Preparing for the SSL certificates and the web directories, we create four folders and set the correct permissions:
mkdir -p /var/log/nextcloud /var/nc_data /var/www/letsencrypt/.well-known/acme-challenge /etc/letsencrypt/rsa-certs /etc/letsencrypt/ecc-certs chown -R www-data:www-data /var/nc_data /var/www /var/log/nextcloud
The installation of the web server is thus already completed and we continue with the installation and adjustments of PHP.
The PHP repository has already been set up and activated in the previous chapter, so we can start the installation directly.
apt update && apt install -y php-common \php8.3-{fpm,gd,curl,xml,zip,intl,mbstring,bz2,ldap,apcu,bcmath,gmp,imagick,igbinary,mysql,redis,smbclient,sqlite3,cli,common,opcache,readline} \
imagemagick libmagickcore-6.q16-6-extra --allow-change-held-packages
Optional (in case of a planned use of Samba and/or cifs shares or an LDAP(s) connection):
apt install -y ldap-utils nfs-common cifs-utils
Set the correct date format to enable correct logging:
timedatectl set-timezone Europe/Berlin
Before we start with the optimizations of PHP, we back up the configuration files:
cp /etc/php/8.3/fpm/pool.d/www.conf /etc/php/8.3/fpm/pool.d/www.conf.bak cp /etc/php/8.3/fpm/php-fpm.conf /etc/php/8.3/fpm/php-fpm.conf.bak cp /etc/php/8.3/cli/php.ini /etc/php/8.3/cli/php.ini.bak cp /etc/php/8.3/fpm/php.ini /etc/php/8.3/fpm/php.ini.bak cp /etc/php/8.3/mods-available/apcu.ini /etc/php/8.3/mods-available/apcu.ini.bak cp /etc/php/8.3/mods-available/opcache.ini /etc/php/8.3/mods-available/opcache.ini.bak cp /etc/ImageMagick-6/policy.xml /etc/ImageMagick-6/policy.xml.bak systemctl restart php8.3-fpm.service
The parameters used below can be determined, among other things, with the help of this script.
» codeberg: https://codeberg.org/criegerde/nextcloud/raw/branch/master/skripte/phpcalc.sh
Execute the following commands:
sed -i "s/;env[HOSTNAME] = /env[HOSTNAME] = /" /etc/php/8.3/fpm/pool.d/www.conf sed -i "s/;env[TMP] = /env[TMP] = /" /etc/php/8.3/fpm/pool.d/www.conf sed -i "s/;env[TMPDIR] = /env[TMPDIR] = /" /etc/php/8.3/fpm/pool.d/www.conf sed -i "s/;env[TEMP] = /env[TEMP] = /" /etc/php/8.3/fpm/pool.d/www.conf sed -i "s/;env[PATH] = /env[PATH] = /" /etc/php/8.3/fpm/pool.d/www.conf sed -i 's/pm = dynamic/pm = ondemand/' /etc/php/8.3/fpm/pool.d/www.conf sed -i 's/pm.max_children =./pm.max_children = 200/' /etc/php/8.3/fpm/pool.d/www.conf sed -i 's/pm.start_servers =./pm.start_servers = 100/' /etc/php/8.3/fpm/pool.d/www.conf sed -i 's/pm.min_spare_servers =./pm.min_spare_servers = 60/' /etc/php/8.3/fpm/pool.d/www.conf sed -i 's/pm.max_spare_servers =./pm.max_spare_servers = 140/' /etc/php/8.3/fpm/pool.d/www.conf sed -i "s/;pm.max_requests =./pm.max_requests = 1000/" /etc/php/8.3/fpm/pool.d/www.conf sed -i "s/allow_url_fopen =./allow_url_fopen = 1/" /etc/php/8.3/fpm/php.ini
sed -i "s/output_buffering =./output_buffering = Off/" /etc/php/8.3/cli/php.ini sed -i "s/max_execution_time =./max_execution_time = 3600/" /etc/php/8.3/cli/php.ini sed -i "s/max_input_time =./max_input_time = 3600/" /etc/php/8.3/cli/php.ini sed -i "s/post_max_size =./post_max_size = 10240M/" /etc/php/8.3/cli/php.ini sed -i "s/upload_max_filesize =./upload_max_filesize = 10240M/" /etc/php/8.3/cli/php.ini sed -i "s/;date.timezone./date.timezone = Europe/\Berlin/" /etc/php/8.3/cli/php.ini sed -i "s/;cgi.fix_pathinfo.*/cgi.fix_pathinfo=0/" /etc/php/8.3/cli/php.ini
sed -i "s/memory_limit = 128M/memory_limit = 1G/" /etc/php/8.3/fpm/php.ini sed -i "s/output_buffering =./output_buffering = Off/" /etc/php/8.3/fpm/php.ini sed -i "s/max_execution_time =./max_execution_time = 3600/" /etc/php/8.3/fpm/php.ini sed -i "s/max_input_time =./max_input_time = 3600/" /etc/php/8.3/fpm/php.ini sed -i "s/post_max_size =./post_max_size = 10G/" /etc/php/8.3/fpm/php.ini sed -i "s/upload_max_filesize =./upload_max_filesize = 10G/" /etc/php/8.3/fpm/php.ini sed -i "s/;date.timezone./date.timezone = Europe/\Berlin/" /etc/php/8.3/fpm/php.ini sed -i "s/;cgi.fix_pathinfo./cgi.fix_pathinfo=0/" /etc/php/8.3/fpm/php.ini sed -i "s/;session.cookie_secure./session.cookie_secure = True/" /etc/php/8.3/fpm/php.ini sed -i "s/;opcache.enable=./opcache.enable=1/" /etc/php/8.3/fpm/php.ini sed -i "s/;opcache.validate_timestamps=./opcache.validate_timestamps=1/" /etc/php/8.3/fpm/php.ini sed -i "s/;opcache.enable_cli=./opcache.enable_cli=1/" /etc/php/8.3/fpm/php.ini sed -i "s/;opcache.memory_consumption=./opcache.memory_consumption=256/" /etc/php/8.3/fpm/php.ini sed -i "s/;opcache.interned_strings_buffer=./opcache.interned_strings_buffer=64/" /etc/php/8.3/fpm/php.ini sed -i "s/;opcache.max_accelerated_files=./opcache.max_accelerated_files=100000/" /etc/php/8.3/fpm/php.ini sed -i "s/;opcache.revalidate_freq=./opcache.revalidate_freq=0/" /etc/php/8.3/fpm/php.ini sed -i "s/;opcache.save_comments=./opcache.save_comments=1/" /etc/php/8.3/fpm/php.ini sed -i "s/;opcache.huge_code_pages=.*/opcache.huge_code_pages=0/" /etc/php/8.3/fpm/php.ini
sed -i "s|;emergency_restart_threshold.*|emergency_restart_threshold = 10|g" /etc/php/8.3/fpm/php-fpm.conf sed -i "s|;emergency_restart_interval.*|emergency_restart_interval = 1m|g" /etc/php/8.3/fpm/php-fpm.conf sed -i "s|;process_control_timeout.*|process_control_timeout = 10|g" /etc/php/8.3/fpm/php-fpm.conf
sed -i '$aapc.enable_cli=1' /etc/php/8.3/mods-available/apcu.ini
sed -i 's/opcache.jit=off/; opcache.jit=off/' /etc/php/8.3/mods-available/opcache.ini sed -i '$aopcache.jit=1255' /etc/php/8.3/mods-available/opcache.ini sed -i '$aopcache.jit_buffer_size=256M' /etc/php/8.3/mods-available/opcache.ini
sed -i "s/rights=\
You can also find these files at
» codeberg: https://codeberg.org/criegerde/nextcloud/raw/branch/master/etc/php/8.3/fpm/php.ini
» codeberg: https://codeberg.org/criegerde/nextcloud/raw/branch/master/etc/php/8.3/fpm/pool.d/www.conf
Let's optimize PHP for MariaDB
sed -i '$a[mysql]' /etc/php/8.3/mods-available/mysqli.ini sed -i '$amysql.allow_local_infile=On' /etc/php/8.3/mods-available/mysqli.ini sed -i '$amysql.allow_persistent=On' /etc/php/8.3/mods-available/mysqli.ini sed -i '$amysql.cache_size=2000' /etc/php/8.3/mods-available/mysqli.ini sed -i '$amysql.max_persistent=-1' /etc/php/8.3/mods-available/mysqli.ini sed -i '$amysql.max_links=-1' /etc/php/8.3/mods-available/mysqli.ini sed -i '$amysql.default_port=3306' /etc/php/8.3/mods-available/mysqli.ini sed -i '$amysql.connect_timeout=60' /etc/php/8.3/mods-available/mysqli.ini sed -i '$amysql.trace_mode=Off' /etc/php/8.3/mods-available/mysqli.ini
Restart both services, nginx and PHP now:
systemctl restart php8.3-fpm.service nginx.service
PHP is now also installed and optimized for the operation of Nextcloud. For further PHP optimizations, you can find additional tuning options in this article. Let's now start with the installation and configuration of the database server MariaDB.
The installation of MariaDB is done with this command:
apt update && apt install -y mariadb-server
Please note the following instructions:
(1) counteract potential problems using apt-mark hold
(2) manual database server upgrade
(3) manufacturer's recommendation for upgrading from MariaDB v. 10.6 to v. 10.11
Now let's harden the database server using the supplied tool "mysql_secure_installation". During a first installation, there is no root password, so you can confirm the prompt by pressing ENTER. It is recommended to set a password directly, the corresponding dialog will appear automatically:
mysql_secure_installation Enter current password for root (enter for none): <ENTER> or type the password Switch to unix_socket authentication [Y/n] Y Change the root password? [Y/n] Y Remove anonymous users? [Y/n] Y Disallow root login remotely? [Y/n] Y Remove test database and access to it? [Y/n] Y Reload privilege tables now? [Y/n] Y
Stop the database server now and then back up the default configuration to be able to make adjustments immediately afterwards (» codeberg: https://codeberg.org/criegerde/nextcloud/src/branch/master/etc/mysql/my.cnf):
systemctl stop mysql mkdir -p /var/log/mysql chown -R mysql:mysql /var/log/mysql mv /etc/mysql/my.cnf /etc/mysql/my.cnf.bak nano /etc/mysql/my.cnf
Copy all the following lines into the empty file:
[client]default-character-set = utf8mb4port = 3306socket = /var/run/mysqld/mysqld.sock[mysqld_safe]log_error=/var/log/mysql/mysql_error.lognice = 0socket = /var/run/mysqld/mysqld.sock[mysqld]# performance_schema=ONbasedir = /usrbind-address = 127.0.0.1binlog_format = ROWcharacter-set-server = utf8mb4collation-server = utf8mb4_general_cidatadir = /var/lib/mysqldefault_storage_engine = InnoDBexpire_logs_days = 2general_log_file = /var/log/mysql/mysql.loginnodb_buffer_pool_size = 2Ginnodb_log_buffer_size = 32Minnodb_log_file_size = 512Minnodb_read_only_compressed=OFFjoin_buffer_size = 2Mkey_buffer_size = 512Mlc_messages_dir = /usr/share/mysqllc_messages = en_USlog_bin = /var/log/mysql/mariadb-binlog_bin_index = /var/log/mysql/mariadb-bin.indexlog_bin_trust_function_creators = truelog_error = /var/log/mysql/mysql_error.loglog_slow_verbosity = query_planlog_warnings = 2long_query_time = 1max_connections = 100max_heap_table_size = 64Mmax_allowed_packet = 128Mmyisam_sort_buffer_size = 512Mport = 3306pid-file = /var/run/mysqld/mysqld.pidquery_cache_limit = 0query_cache_size = 0 read_buffer_size = 2Mread_rnd_buffer_size = 2Mskip-name-resolvesocket = /var/run/mysqld/mysqld.socksort_buffer_size = 2Mtable_open_cache = 400table_definition_cache = 800tmp_table_size = 32Mtmpdir = /tmptransaction_isolation = READ-COMMITTEDuser = mysqlwait_timeout = 600[mysqldump]max_allowed_packet = 128Mquickquote-names[isamchk]
key_buffer = 16M
Save and close the file and then restart the database server to set up the Nextcloud database, the Nextcloud user, and its password:
systemctl restart mysql.service
mysql -uroot -p -e "CREATE DATABASE nextclouddb CHARACTER SET utf8mb4 COLLATE utf8mb4_general_ci; CREATE USER nextclouddbuser@localhost identified by 'nextclouddbpassword'; GRANT ALL PRIVILEGES on nextclouddb.* to nextclouddbuser@localhost; FLUSH privileges;"
Explanation (please adjust according to your wishes):
Database name: nextclouddb
Database user: nextclouddbuser
Database user password: nextclouddbpassword
mysql -h localhost -uroot -p -e "SELECT @@TX_ISOLATION; SELECT SCHEMA_NAME 'database', default_character_set_name 'charset', DEFAULT_COLLATION_NAME 'collation' FROM information_schema.SCHEMATA WHERE SCHEMA_NAME='nextclouddb'"
Appears in the output (resultset) "READ-COMMITTED" and "_utf8mb4_general_c_i"
so everything was set up correctly and we can proceed with the installation of Redis.
We install the Redis server to improve Nextcloud performance, as Redis reduces the load on the MariaDB-Nextcloud database:
Note regarding Redis and the license change: https://digitalcourage.social/@crits/112205838874261587
apt update && apt install -y redis-server
Adjust the Redis configuration by backing up and modifying the configuration by executing the following commands (» codeberg: https://codeberg.org/criegerde/nextcloud/src/branch/master/etc/redis/redis.conf):
cp /etc/redis/redis.conf /etc/redis/redis.conf.bak sed -i 's/port 6379/port 0/' /etc/redis/redis.conf sed -i s/#\ unixsocket/\unixsocket/g /etc/redis/redis.conf sed -i 's/unixsocketperm 700/unixsocketperm 770/' /etc/redis/redis.conf sed -i 's/# maxclients 10000/maxclients 10240/' /etc/redis/redis.conf sed -i 's/# requirepass foobared/requirepass PleaseChange/' /etc/redis/redis.conf usermod -aG redis www-data cp /etc/sysctl.conf /etc/sysctl.conf.bak sed -i '$avm.overcommit_memory = 1' /etc/sysctl.conf
Based on sufficient installation experience, I recommend that you restart the entire server once:
reboot now
Congratulations, the server is already fully installed and set up, so the setup of Nextcloud can now begin.
We set up various vHosts, that is, web server configuration files, and modify the default vHost file (default.conf) so that it is not automatically changed by later system updates. Since the system was restarted earlier, we switch back to privileged user mode.
sudo -s
Secure the standard vhost file named default.conf and first create empty vHost files for configuration.
[ -f /etc/nginx/conf.d/default.conf ] && mv /etc/nginx/conf.d/default.conf /etc/nginx/conf.d/default.conf.bak
Thus, the empty "default.conf" file ensures that this default configuration does not affect the Nextcloud operation even during later updates of the web server.
Create the global vhost file to permanently redirect http standard requests to https and also enable SSL certificate communication with Let’sEncrypt (» codeberg: https://codeberg.org/criegerde/nextcloud/src/branch/master/etc/nginx/conf.d/http.conf):
nano /etc/nginx/conf.d/http.conf
Copy all the following lines into the file http.conf and adjust the red marked domain name according to your system:
upstream php-handler { server unix:/run/php/php8.3-fpm.sock; } map $arg_v $asset_immutable { "" ""; default "immutable"; } server { listen 80 default_server; listen [::]:80 default_server; server_name their.domain.de; root /var/www; location ^~ /.well-known/acme-challenge { default_type text/plain; root /var/www/letsencrypt; } location / { return 301 https://$host$request_uri; } }
Save and close this file. Now edit the actual Nextcloud vHost file nextcloud.conf, which contains all configurations for the operation of Nextcloud.
nano /etc/nginx/conf.d/nextcloud.conf
Copy all the following lines into the file nextcloud.conf and adjust the red marked domain name according to your system (» codeberg: https://codeberg.org/criegerde/nextcloud/src/branch/master/etc/nginx/conf.d/nextcloud.conf):
server {listen 443 ssl default_server;listen [::]:443 ssl default_server;http2 on;
server_name their.domain.de;
ssl_certificate /etc/ssl/certs/ssl-cert-snakeoil.pem;ssl_certificate_key /etc/ssl/private/ssl-cert-snakeoil.key;ssl_trusted_certificate /etc/ssl/certs/ssl-cert-snakeoil.pem;#ssl_certificate /etc/letsencrypt/rsa-certs/fullchain.pem;#ssl_certificate_key /etc/letsencrypt/rsa-certs/privkey.pem;#ssl_certificate /etc/letsencrypt/ecc-certs/fullchain.pem;#ssl_certificate_key /etc/letsencrypt/ecc-certs/privkey.pem;#ssl_trusted_certificate /etc/letsencrypt/ecc-certs/chain.pem;ssl_dhparam /etc/ssl/certs/dhparam.pem;ssl_session_timeout 1d;ssl_session_cache shared:SSL:50m;ssl_session_tickets off;ssl_protocols TLSv1.3 TLSv1.2;ssl_ciphers 'TLS-CHACHA20-POLY1305-SHA256:TLS-AES-256-GCM-SHA384:ECDHE-RSA-AES256-GCM-SHA512:DHE-RSA-AES256-GCM-SHA512:ECDHE-RSA-AES256-GCM-SHA384:DHE-RSA-AES256-GCM-SHA384';ssl_ecdh_curve X448:secp521r1:secp384r1;ssl_prefer_server_ciphers on;ssl_stapling on;ssl_stapling_verify on;client_max_body_size 10G;client_body_timeout 3600s;client_body_buffer_size 512k;fastcgi_buffers 64 4K;gzip on;gzip_vary on;gzip_comp_level 4;gzip_min_length 256;gzip_proxied expired no-cache no-store private no_last_modified no_etag auth;gzip_types application/atom+xml text/javascript application/javascript application/json application/ld+json application/manifest+json application/rss+xml application/vnd.geo+json application/vnd.ms-fontobject application/wasm application/x-font-ttf application/x-web-app-manifest+json application/xhtml+xml application/xml font/opentype image/bmp image/svg+xml image/x-icon text/cache-manifest text/css text/plain text/vcard text/vnd.rim.location.xloc text/vtt text/x-component text/x-cross-domain-policy;add_header Strict-Transport-Security "max-age=15768000; includeSubDomains; preload;" always;add_header Permissions-Policy "interest-cohort=()";add_header Referrer-Policy "no-referrer" always;add_header X-Content-Type-Options "nosniff" always;add_header X-Download-Options "noopen" always;add_header X-Frame-Options "SAMEORIGIN" always;add_header X-Permitted-Cross-Domain-Policies "none" always;add_header X-Robots-Tag "noindex, nofollow" always;add_header X-XSS-Protection "1; mode=block" always;fastcgi_hide_header X-Powered-By;include mime.types;types {text/javascript mjs;}root /var/www/nextcloud;index index.php index.html /index.php$request_uri;location = / {if ( $http_user_agent ~ ^DavClnt ) {return 302 /remote.php/webdav/$is_args$args;}}location = /robots.txt {allow all;log_not_found off;access_log off;}location ^~ /.well-known {location = /.well-known/carddav { return 301 /remote.php/dav/; }location = /.well-known/caldav { return 301 /remote.php/dav/; }location /.well-known/acme-challenge { try_files $uri $uri/ =404; }location /.well-known/pki-validation { try_files $uri $uri/ =404; }return 301 /index.php$request_uri;}location ~ ^/(?:build|tests|config|lib|3rdparty|templates|data)(?:$|/) { return 404; }location ~ ^/(?:.|autotest|occ|issue|indie|db_|console) { return 404; }location ~ .php(?:$|/) {rewrite ^/(?!index|remote|public|cron|core/ajax/update|status|ocs/v[12]|updater/.+|ocs-provider/.+|.+/richdocumentscode/proxy) /index.php$request_uri;fastcgi_split_path_info ^(.+?.php)(/.*)$;set $path_info $fastcgi_path_info;try_files $fastcgi_script_name =404;include fastcgi_params;fastcgi_param SCRIPT_FILENAME $document_root$fastcgi_script_name;fastcgi_param PATH_INFO $path_info;fastcgi_param HTTPS on;fastcgi_param modHeadersAvailable true;fastcgi_param front_controller_active true;fastcgi_pass php-handler;fastcgi_intercept_errors on;fastcgi_request_buffering off;fastcgi_read_timeout 3600;fastcgi_send_timeout 3600;fastcgi_connect_timeout 3600;fastcgi_max_temp_file_size 0;}location ~ .(?:css|js|mjs|svg|gif|png|jpg|ico|wasm|tflite|map|ogg|flac)$ {try_files $uri /index.php$request_uri;add_header Cache-Control "public, max-age=15778463, $asset_immutable";expires 6M;access_log off;location ~ .wasm$ {default_type application/wasm;}}location ~ .woff2?$ {try_files $uri /index.php$request_uri;expires 7d;access_log off;}location /remote {return 301 /remote.php$request_uri;}location / {try_files $uri $uri/ /index.php$request_uri;}
}
Save and close this file and then enhance server and system security through the possibility of secure key exchange using a Diffie-Hellman key (» git: https://codeberg.org/criegerde/nextcloud/src/branch/master/etc/ssl/certs/dhparam.pem):
openssl dhparam -dsaparam -out /etc/ssl/certs/dhparam.pem 4096
Please be patient now! The generation may take a few minutes depending on the system performance. Only when the generation is complete will we restart the web server.
systemctl restart nginx.service
We now begin the 'actual' installation of the Nextcloud software and set up the SSL certificates from Let’s Encrypt using acme. Please switch to the working directory.
cd /usr/local/src
and download the current Nextcloud release:
wget https://download.nextcloud.com/server/releases/latest.tar.bz2 wget https://download.nextcloud.com/server/releases/latest.tar.bz2.md5
Check the files:
md5sum -c latest.tar.bz2.md5 < latest.tar.bz2
Only when the test is confirmed with "OK" will we proceed!
Unpack the Nextcloud software into the web directory (/var/www), set the necessary permissions, and delete the downloaded files:
tar -xjf latest.tar.bz2 -C /var/www && chown -R www-data:www-data /var/www/ && rm -f latest.tar.bz2
Please ensure that your server is accessible from the outside via both port 80/TCP and port 443/TCP. The creation and updating of Let’s Encrypt certificates must be done via http and port 80 as part of this guide. Other options are described by us in the Article (Let’s Encrypt certificates (RSA 4096 or EC 384) apply for and create without open TCP ports 80 and 443).
For the certificate handling, we are now creating a dedicated user and adding this to the www-data group:
adduser acmeuser --gecos "" --disabled-password usermod -aG www-data acmeuser
We will grant this technical user the necessary permissions to initiate the required web server start during a certificate renewal.
touch /etc/sudoers.d/acmeuser cat <<EOF >/etc/sudoers.d/acmeuser acmeuser ALL=NOPASSWD: /bin/systemctl reload nginx.service EOF
Switch to the shell of the new user (acmeuser) to install the certificate software and exit this shell immediately afterwards:
su - acmeuser
curl https://get.acme.sh | sh exit
Adjust the appropriate file and directory permissions to be able to store the new certificates in it:
chmod -R 775 /var/www/letsencrypt && chmod -R 770 /etc/letsencrypt && chown -R www-data:www-data /var/www/ /etc/letsencrypt
Set Let’s Encrypt as the default CA for your server
su - acmeuser -c ".acme.sh/acme.sh --set-default-ca --server letsencrypt"
and then switch again to the shell of the new user
su - acmeuser
Now apply for the SSL certificates from Let’s Encrypt and replace your.domain.de with your actual domain:
acme.sh --issue -d ihre.domain.de --server letsencrypt --keylength 4096 -w /var/www/letsencrypt --key-file /etc/letsencrypt/rsa-certs/privkey.pem --ca-file /etc/letsencrypt/rsa-certs/chain.pem --cert-file /etc/letsencrypt/rsa-certs/cert.pem --fullchain-file /etc/letsencrypt/rsa-certs/fullchain.pem --reloadcmd "sudo /bin/systemctl reload nginx.service"
acme.sh --issue -d ihre.domain.de --server letsencrypt --keylength ec-384 -w /var/www/letsencrypt --key-file /etc/letsencrypt/ecc-certs/privkey.pem --ca-file /etc/letsencrypt/ecc-certs/chain.pem --cert-file /etc/letsencrypt/ecc-certs/cert.pem --fullchain-file /etc/letsencrypt/ecc-certs/fullchain.pem --reloadcmd "sudo /bin/systemctl reload nginx.service"
Leave the shell of the new user
exit
and then create a script that will check and correct the permissions in the future (permissions.sh):
nano /root/permissions.sh
Copy all lines into the file:
#!/bin/bash find /var/www/ -type f -print0 | xargs -0 chmod 0640 find /var/www/ -type d -print0 | xargs -0 chmod 0750 if [ -d "/var/www/nextcloud/apps/notify_push" ]; then chmod ug+x /var/www/nextcloud/apps/notify_push/bin/x86_64/notify_push fi chmod -R 775 /var/www/letsencrypt chmod -R 770 /etc/letsencrypt chown -R www-data:www-data /var/www /etc/letsencrypt chown -R www-data:www-data /var/nc_data chmod 0644 /var/www/nextcloud/.htaccess chmod 0644 /var/www/nextcloud/.user.ini exit 0
Mark the script as executable and then run it directly:
chmod +x /root/permissions.sh /root/permissions.sh
Remove your previously used self-signed certificates from nginx and enable the new, fully qualified and already valid SSL certificates from Let’s Encrypt. Then restart the web server:
sed -i '/ssl-cert-snakeoil/d' /etc/nginx/conf.d/nextcloud.conf sed -i s/#\ssl/\ssl/g /etc/nginx/conf.d/nextcloud.conf systemctl restart nginx.service
To automatically renew the SSL certificates and initiate the necessary web server restart, a cron job was created automatically.
crontab -l -u acmeuser
We can now proceed with the setup of Nextcloud. To do this, use the following "silent" installation command:
sudo -u www-data php /var/www/nextcloud/occ maintenance:install --database "mysql" --database-name "nextclouddb" --database-user "nextclouddbuser" --database-pass "nextclouddbpassword" --admin-user "YourNextcloudAdmin" --admin-pass "YourNextcloudAdminPasssword" --data-dir "/var/nc_data"
Explanations:
database-name „nextclouddb“ : Database name from Chapter 3
database-user “nextclouddbuser” : Database user from Chapter 3
database-pass “nextclouddbpassword” : Database user password from Chapter 3
admin-user “YourNextcloudAdmin” : freely selectable by you
admin-pass “YourNextcloudAdminPasssword” : freely selectable by you
Wait until the installation of Nextcloud is complete and then adjust the central configuration file of Nextcloud "config.php" as web user www-data:
- Add your domain and the server's IP as a "trusted domain", including your.domain.de and y.x.y.z with your dedicated domain:
sudo -u www-data php /var/www/nextcloud/occ config:system:set trusted_domains 0 --value=w.x.y.z sudo -u www-data php /var/www/nextcloud/occ config:system:set trusted_domains 1 --value=your.domain.de
- Set your domain as overwrite.cli.url and overwritehost, adding your.domain.de with your dedicated domain:
sudo -u www-data php /var/www/nextcloud/occ config:system:set overwrite.cli.url --value=https://your.domain.com sudo -u www-data php /var/www/nextcloud/occ config:system:set overwritehost --value=your.domain.com
Now we will finally expand the Nextcloud configuration. First, back up the existing config.php and then execute the following lines in a block (» codeberg: https://codeberg.org/criegerde/nextcloud/src/branch/master/var/www/nextcloud/config/config.php and https://codeberg.org/criegerde/nextcloud/src/branch/master/var/www/nextcloud/config/tweaks.config.php):
sudo -u www-data cp /var/www/nextcloud/config/config.php /var/www/nextcloud/config/config.php.bak
sed -i '/);/d' /var/www/nextcloud/config/config.phpcat <<EOF >>/var/www/nextcloud/config/config.php 'activity_expire_days' => 14, 'allow_local_remote_servers' => true, 'auth.bruteforce.protection.enabled' => true, 'blacklisted_files' => array ( 0 => '.htaccess', 1 => 'Thumbs.db', 2 => 'thumbs.db', ), 'cron_log' => true,'
'default_phone_region' => 'DE',
'enable_previews' => true, 'enabledPreviewProviders' => array ( 0 => 'OC\Preview\PNG', 1 => 'OC\Preview\JPEG', 2 => 'OC\Preview\GIF', 3 => 'OC\Preview\BMP', 4 => 'OC\Preview\XBitmap', 5 => 'OC\Preview\Movie', 6 => 'OC\Preview\PDF', 7 => 'OC\Preview\MP3', 8 => 'OC\Preview\TXT', 9 => 'OC\Preview\MarkDown', 10 => 'OC\Preview\HEIC', 11 => 'OC\Preview\Movie', 12 => 'OC\Preview\MKV', 13 => 'OC\Preview\MP4', 14 => 'OC\Preview\AVI', ), 'filesystem_check_changes' => 0, 'filelocking.enabled' => 'true', 'htaccess.RewriteBase' => '/', 'integrity.check.disabled' => false, 'knowledgebaseenabled' => false, 'log_rotate_size' => '104857600', 'logfile' => '/var/log/nextcloud/nextcloud.log', 'loglevel' => 2,'
'logtimezone' => 'Europe/Berlin',
'memcache.local' => '\\OC\\Memcache\\APCu', 'memcache.locking' => '\\OC\\Memcache\\Redis', 'overwriteprotocol' => 'https', 'preview_max_x' => 1024, 'preview_max_y' => 768, 'preview_max_scale_factor' => 1, 'profile.enabled' => false, 'redis' => array ( 'host' => '/var/run/redis/redis-server.sock', 'port' => 0,
'password' => 'PleaseChange',
'timeout' => 0.5, 'dbindex' => 1, ), 'quota_include_external_storage' => false, 'share_folder' => '/Shares', 'skeletondirectory' => '', 'trashbin_retention_obligation' => 'auto, 7', 'maintenance_window_start' => 1, );EOF
sed -i 's/^[ ]*//' /var/www/nextcloud/config/config.php
Modify the ".user.ini"
sudo -u www-data sed -i "s/output_buffering=.*/output_buffering=0/" /var/www/nextcloud/.user.ini
and adjust the Nextcloud apps as user www-data
sudo -u www-data php /var/www/nextcloud/occ app:disable survey\_clientsudo -u www-data php /var/www/nextcloud/occ app:disable firstrunwizard
Optional Nextcloud Office:
sudo -u www-data /usr/bin/php /var/www/nextcloud/occ app:install richdocuments sudo -u www-data /usr/bin/php /var/www/nextcloud/occ app:install richdocumentscode
Nextcloud is now fully operational, optimized, and secured. Restart all relevant services:
systemctl stop nginx.service systemctl stop php8.3-fpm.service systemctl restart mysql.service systemctl restart php8.3-fpm.service systemctl restart redis-server.service systemctl restart nginx.service
Set up a cron job for Nextcloud as the "www-data" user:
crontab -u www-data -e
Add this line at the end
*/5 * * * * php -f /var/www/nextcloud/cron.php > /dev/null 2>&1
Save and then close the file and configure the Nextcloud job from 'Ajax' to 'Cron' using Nextcloud's CLI to:
sudo -u www-data php /var/www/nextcloud/occ background:cron
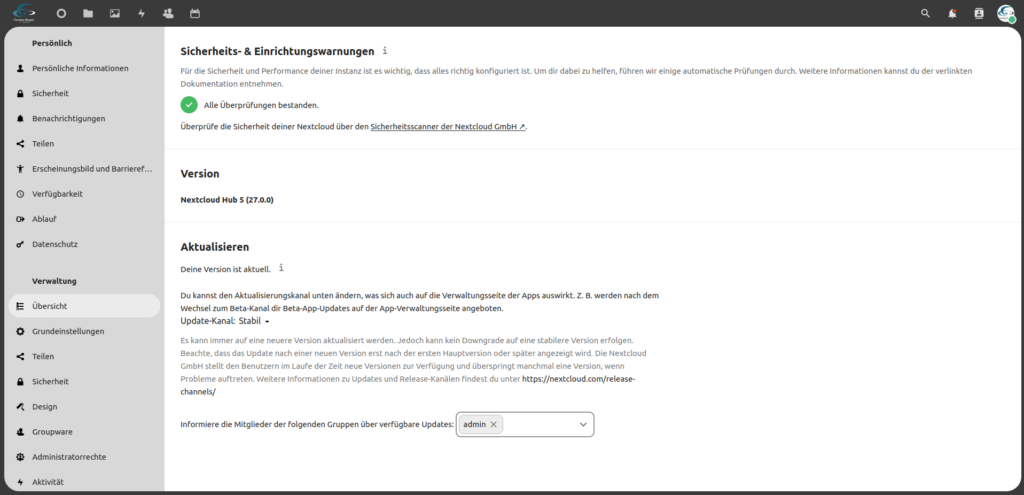
Please take some time and check the security status of your server.
Verification successful
Nextcloud Office
The goal should also be to achieve at least the "A+" results shown below in the tests:
To avoid difficulties that may arise from updates to the components used, the relevant packages can be excluded from updating using "apt-mark hold":
apt-mark hold nginxapt-mark hold redisapt-mark hold mariadb* mysql galera*
apt-mark hold php-* php8.3-*
To take these packages into account again as part of updates, only the "hold" needs to be lifted:
apt-mark unhold nginxapt-mark unhold redisapt-mark unhold mariadb* mysql galera*
apt-mark unhold php-* php8.3-*
After the update, we recommend setting it back to 'hold'.
First, we install crowdsec to protect the server against brute-force attacks and failed login attempts. Set up the repository for this:
curl -s https://packagecloud.io/install/repositories/crowdsec/crowdsec/script.deb.sh | sudo bash
Only for Ubuntu 24:
sed -i 's/noble/jammy/' /etc/apt/sources.list.d/crowdsec_crowdsec.list
From here on, it continues again for both Denian and Ubuntu 22/24.x:
Update the repositories and then install crowdsec.
apt update
apt install crowdsec
Now let's ensure the "autostart" of the CrowdSec software:
systemctl enable --now crowdsec.service
and check if CrowdSec is started and set to autostart ('enabled'):
systemctl status crowdsec.service
Now let's set up the basic rules of the IPS to achieve basic protection. For this, we install "crowdsec-firewall-bouncer-nftables" according to:
apt install crowdsec-firewall-bouncer-nftables
and let us display the available and used rules (Bouncer):
cscli bouncers list
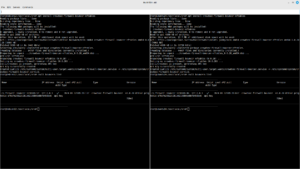
The basic protection is now guaranteed and already includes various scenarios and parsers:
cscli scenarios list && cscli parser list
To secure your cloud server against NGINX and Nextcloud attacks, we add both an NGINX-, as well as a Nextcloud- and SSH- collection:
cscli collections install crowdsecurity/nginxcscli collections install crowdsecurity/nextcloud
cscli collections install crowdsecurity/sshd
Now adjust the path of the Nextcloud log file for crowdsec:
nano /etc/crowdsec/acquis.yaml
Add the following red marked lines at the end of the file:
[...]---
filenames: - /var/log/nextcloud/nextcloud.loglabels: type: Nextcloud
---
To make these extensions effective, we will still execute this command to update the services:
systemctl reload crowdsec && systemctl restart crowdsec
Now let the collections be displayed and check whether Nextcloud (Name: nextcloud), NGINX (Name: nginx) and SSH (Name: sshd) are shown with the status "enabled". A further look at the scenarios and parsers also shows us the new extensions:
cscli collections list && cscli scenarios list && cscli parser list
From now on, your system is prepared for attacks such as brute force, DDoS, and similar scenarios, and automatically blocks "critically flagged" IPs for example for 4 hours for your server. This includes analyzing and interpreting attacks on Nextcloud (logins, brute force, etc.), SSH, and NGINX!
Let's install the server-side firewall called uncomplicated firewall (ufw) next. If you have previously changed the SSH port from 22 to another port, you must replace 22 accordingly!
apt install -y ufw ufw allow 80/tcp comment "LetsEncrypt (http)" ufw allow 443/tcp comment "LetsEncrypt (https)" ufw allow 22/tcp comment "SSH"
If you do not want to expose SSH externally (recommended!) and only use it from the internal network, replace the last ufw command (ufw allow 22/tcp) with this one and replace the example subnet with your subnet:
ufw allow proto tcp from w.x.y.0/24 to any port 22 comment "SSH only from the LAN"
Set the firewall logging to "medium" and prevent undefined incoming connections.
ufw logging medium ufw default deny incoming
Activate the firewall and restart it:
ufw enable systemctl restart ufw.service ufw status verbose
Nextcloud communicates with various remote servers to process, exchange, and provide certain information:
- www.nextcloud.com, www.startpage.com, www.eff.org, www.edri.org for checking the internet connection
- apps.nextcloud.com for the available apps
- updates.nextcloud.com for Nextcloud updates
- lookup.nextcloud.com For updating and lookup in the federated sharing addressbook
- push-notifications.nextcloud.com for sending push notifications to mobile clients
- surveyserver.nextcloud.com if the admin has agreed to share anonymized data
- Any remote Nextcloud server that is connected with federated sharing
- …
Source: Nextcloud
- Send system mails via postfix
Update your server and install postfix. This gives you the option to be notified by email from fail2ban, apticron, and on SSH logins:
apt update && apt install -y postfix mailutils
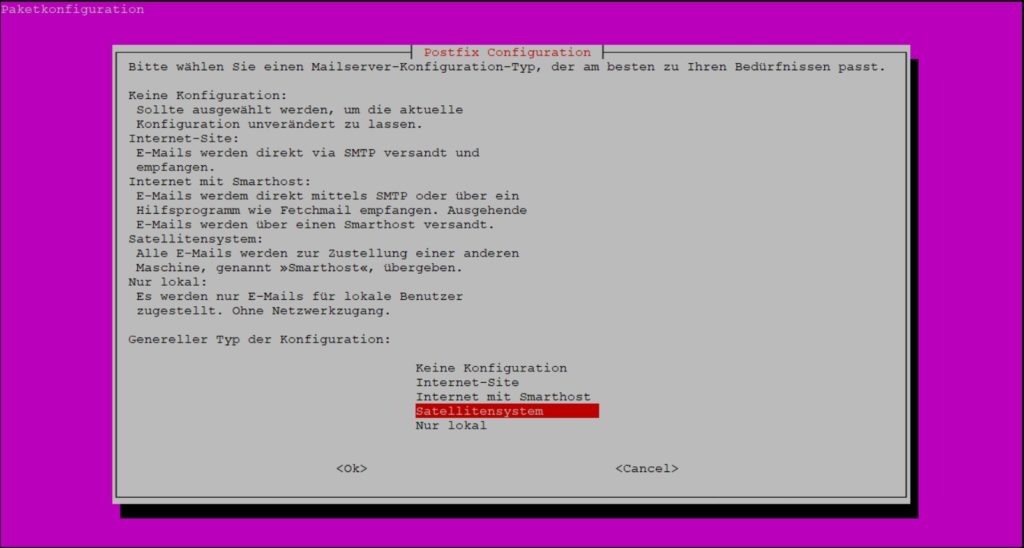
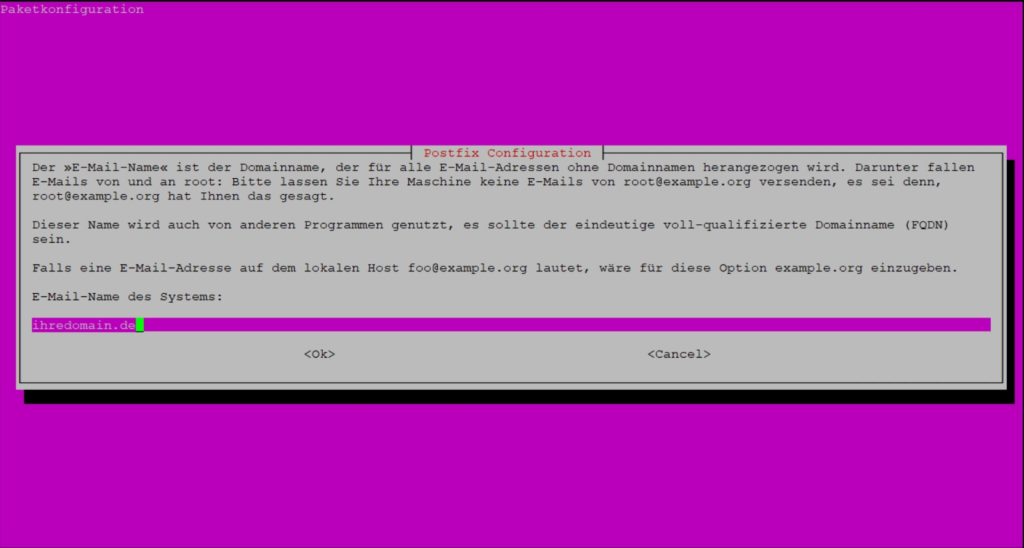
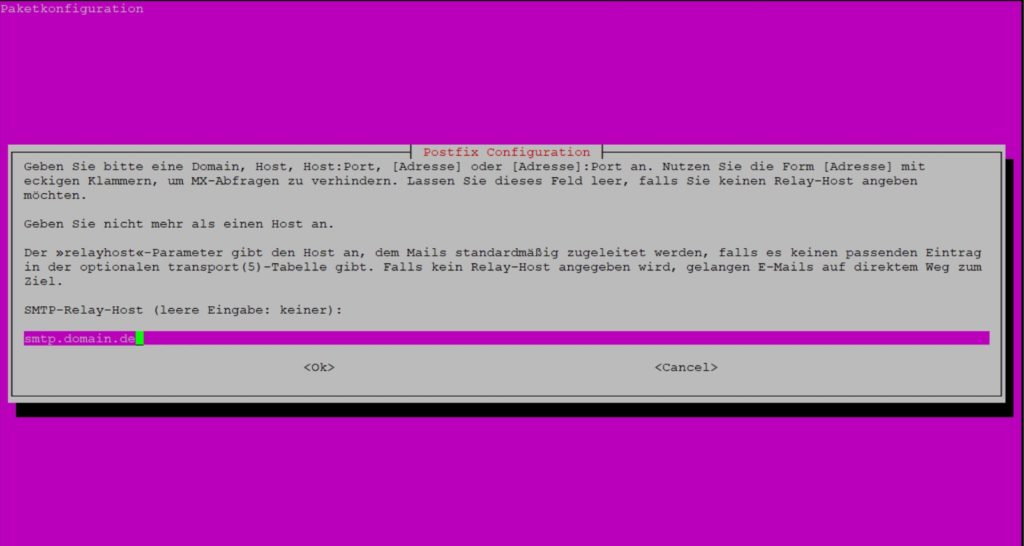
Create your mail configuration based on my following example: First, select satellite system, then enter your domain (e.g. domain.de) and finally the smtp server.
Now adjust the Postfix configuration:
nano /etc/postfix/main.cf
Replace the red marked areas:
smtpd_banner = $myhostname ESMTP $mail_name (Ubuntu) biff = no append_dot_mydomain = no readme_directory = no compatibility_level = 2 smtpd_tls_cert_file=/etc/ssl/certs/ssl-cert-snakeoil.pem smtpd_tls_key_file=/etc/ssl/private/ssl-cert-snakeoil.key smtpd_tls_security_level=may smtp_tls_CApath=/etc/ssl/certs smtp_tls_security_level=may smtp_tls_session_cache_database = btree:${data_directory}/smtp_scache smtpd_relay_restrictions = permit_mynetworks permit_sasl_authenticated defer_unauth_destination myhostname = your.domain.de alias_maps = hash:/etc/aliases alias_database = hash:/etc/aliases mydestination = $myhostname, your.domain.de, localhost.domain.de, localhost relayhost = smtp.mailserver.de:587 mynetworks = 127.0.0.0/8 [::ffff:127.0.0.0]/104 [::1]/128 mailbox_size_limit = 0 recipient_delimiter = + inet_interfaces = loopback-only inet_protocols = all #In case of problems with IPv6, change the line as follows #inet_protocols = ipv4 smtp_sasl_auth_enable = yes smtp_sasl_password_maps = hash:/etc/postfix/sasl_passwd smtp_sasl_security_options = noanonymous sender_canonical_maps = hash:/etc/postfix/sender_canonical smtp_use_tls = yes smtp_enforce_tls = yes
Now enter the access data for sending emails:
nano /etc/postfix/sasl_passwd
Enter the data as follows and replace the red values with your own:
smtp.domain.de [email protected]:password
Since the password is in plain text in this file, we set the file permissions to 600.
chmod 600 /etc/postfix/sasl_passwd
Now write the domain into the file mailname:
nano /etc/mailname
Replace the red value with your domain:
domain.de
Finally, we define the relationship of users to email addresses. Open the file
nano /etc/postfix/sender_canonical
and set user and email addresses there:
root [email protected] root@hostname [email protected] <Your User> [email protected] www-data [email protected] default [email protected]
Now the configuration is being compiled and Postfix is being restarted:
postmap /etc/postfix/sasl_passwd postmap /etc/postfix/sender_canonical systemctl restart postfix.service
Now test the sending of an email via your Postfix
echo "This is a test email" | mailx -s "Test" [email protected]
If the email does not arrive, please check the log (mail.log):
tail -f /var/log/mail.log
Adjust the PHP configuration to also send PHP mails via postfix:
nano /etc/php/8.3/fpm/php.ini
Set the sendmail_path as follows:
sendmail_path = "/usr/sbin/sendmail -t -i"
and then restart PHP:
systemctl restart php8.3-fpm.service
You can now also configure Nextcloud accordingly
Your mail server is now ready for use and you can now configure additional system emails (e.g. from fail2ban and apticron):
Replace the crowdsec configuration parameters below with your own to receive notifications for failed login attempts and bans. To do this, back up the original crowdsec configuration and then edit it afterwards:
cp /etc/crowdsec/notifications/email.yaml /etc/crowdsec/notifications/email.yaml.bak nano /etc/crowdsec/notifications/email.yaml
Replace the smtp-related data:
[...]smtp_host: smtp.domain.desmtp_username: [email protected]_password: mypasswordsmtp_port: 587sender_email: [email protected]_emails: - [email protected][...]
Activate the notification profile in the following file by removing the hashes before "notifications:" and "- email_default".
nano /etc/crowdsec/profiles.yaml
After saving both configuration files, crowdsec is restarted.
systemctl restart crowdsec
and thus the email notifications activated.
Apticron informs you about available system updates or also when your system is "up2date". Install apticron from the standard software sources of Ubuntu:
apt update && apt install -y apticron
Now we adjust apticron and at least change the following parameters:
cp /usr/lib/apticron/apticron.conf /etc/apticron/apticron.conf nano /etc/apticron/apticron.conf
... EMAIL="[email protected]" ... SYSTEM="your.domain.com" ... NOTIFY_HOLDS="1" ... NOTIFY_NO_UPDATES="1" ... CUSTOM_SUBJECT='$SYSTEM: $NUM_PACKAGES package update(s)' ... CUSTOM_NO_UPDATES_SUBJECT='$SYSTEM: no updates available' ... CUSTOM_FROM="[email protected]" ...
Check apticron and the just configured mail delivery by calling apticron:
apticron
You will now immediately receive an email notification about your current system status. Finally, adjust the cron job to receive notifications regularly and automatically:
cp /etc/cron.d/apticron /etc/cron.d/apticron.bak nano /etc/cron.d/apticron
30 7 * * * root if test -x /usr/sbin/apticron; then /usr/sbin/apticron --cron; else true; fi
Apticron would inform you by email every morning at 07:30 about your system update status based on the example above.
Adjust the profile file and extend it at the end with the following lines:
nano /etc/profile
if [ -n "$SSH_CLIENT" ]; then echo 'Login on' `hostname` `date` `who -m` | mail -s "Login on `hostname` from `echo $SSH_CLIENT | awk '{print $1}'`" [email protected] fi
You will now be actively notified with every successful SSH login.
Create a script to update and optimize the server, Nextcloud, and the activated apps:
cd /root
wget -O update.sh -q https://codeberg.org/criegerde/nextcloud/raw/branch/master/skripte/update.sh
Alternatively, an update script including the Nextcloud Office Docker update is also available to you.
wget -O update.sh -q https://codeberg.org/criegerde/nextcloud/raw/branch/master/skripte/update-nc-office.sh
Mark the script as executable and run it as a privileged user regularly.
chmod +x /root/update.sh
/root/update.sh
First, download additional software components and then install Netdata from git:
cd /usr/local/srcapt install -y apache2-utils zlib1g-dev uuid-dev libuv1-dev liblz4-dev libssl-dev libelf-dev libmnl-dev libyaml-dev libprotobuf-dev protobuf-compiler gcc g++ make git autoconf autoconf-archive autogen automake pkg-config curl python3 cmake flex bison fluent-bit
git clone https://github.com/netdata/netdata.git --depth=100 --recursive
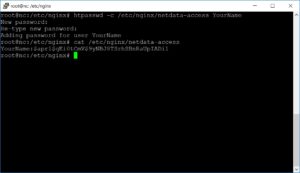
To protect the monitoring, we use the Apache2-utils and set up a password protection in front of Netdata:
htpasswd -c /etc/nginx/netdata-access YourName
Now the installation is starting
cd /usr/local/src/netdata
./netdata-installer.sh --disable-telemetry -u
After a few moments, Netdata is already fully installed and operational – however, a few configurations are still necessary:
nano /etc/netdata/netdata.conf
Change the value for "history" to e.g. 14400 (data from the last 4 hours will be retained, requires about 60 MB of RAM) in the section [global]:
history = 14400
Additionally, adjust the [web] section so that Netdata only listens on localhost:
bind to = 127.0.0.1
In order to use the web interface, the existing vHost file (nextcloud.conf) is extended:
nano /etc/nginx/conf.d/nextcloud.conf
Add the red lines:
[...] location = /robots.txt { allow all; log_not_found off; access_log off; } location /netdata { return 301 /netdata/; } location ~ /netdata/(?<ndpath>.*) { auth_basic "Please enter credentials"; auth_basic_user_file /etc/nginx/netdata-access; proxy_http_version 1.1; proxy_pass_request_headers on; proxy_set_header Connection "keep-alive"; proxy_store off; proxy_pass http://netdata/$ndpath$is_args$args; gzip on; gzip_proxied any; gzip_types *; } [...]
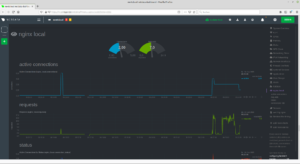
Expand the web server nginx with its built-in status functions – create a new vHost for this (/etc/nginx/conf.d/stub_status.conf)
touch /etc/nginx/conf.d/stub_status.conf && nano /etc/nginx/conf.d/stub_status.conf
and copy all lines into it:
server { listen 127.0.0.1:80 default_server; server_name 127.0.0.1; location /stub_status { stub_status on; allow 127.0.0.1; deny all; } }
Finally, the web server configuration (/etc/nginx/nginx.conf) is extended by the red lines, so that Netdata can be accessed in the existing web server:
nano /etc/nginx/nginx.conf
[...] http { server_names_hash_bucket_size 64; upload netdata { server 127.0.0.1:19999; keepalive 64; } [...]
After a final restart of the Netdata and web server services
systemctl restart netdata.service nginx.service
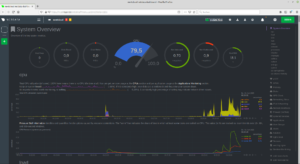
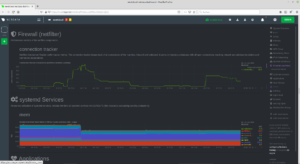
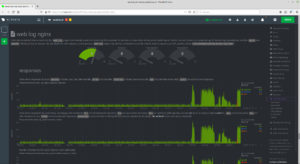
can you already use Netdata and analyze your system:
https://ihre.domain.de/netdata
Netdata: Netdata is an all-in-one monitoring solution, expertly crafted with a blazing-fast C core, flanked by hundreds of collectors. Featuring a comprehensive dashboard with thousands of metrics, extreme performance and configurability, it is the ultimate single-node monitoring tool
To update Netdata, it is sufficient to execute the following script
/usr/libexec/netdata/netdata-updater.sh

The current version is being checked and updated to the latest version if necessary.
The Nextcloud data storage can be relatively easily expanded. Options include NFS (or Samba (cifs)), HHD/SD, and the Nextcloud external storage app. The following examples describe how this works in detail:
First, we install the necessary modules
apt install -y nfs-common
and then expand the fstab
cp /etc/fstab /etc/fstab.bak nano /etc/fstab
to persistently mount the drive in the system:
<IP-NFS-SERVER>:/<ShareName> /<your>/<mountpoint> nfs auto,nofail,noatime,nolock,intr,tcp,actimeo=1800 0 0
After a successful hanging using
chown -R www-data:www-data /<your>/<mountpoint> mount /<your>/<mountpoint>
and the basic copying process requires both the config.php to be adjusted and the Nextcloud index to be rebuilt. First, stop the Nextcloud.
systemctl stop php8.3-fpm.service nginx.service
and then edit the config.php regarding the new data directory:
sudo -u www-data nano /var/www/nextcloud/config/config.php

'datadirectory' =>'/<your>/<mountpoint>',
Now copy the previous data directory to the new directory:
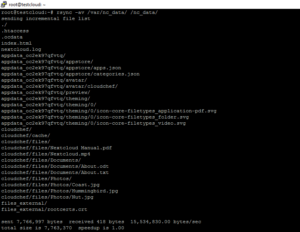
rsync -av --progress --stats /<old data directory>/ /<your>/<mountpoint>
As soon as this copying process is completed, the Nextcloud index will be rebuilt:
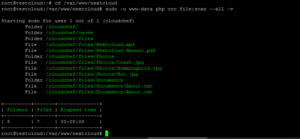
systemctl stop nginx.service php8.3-fpm.service redis-cli -s /var/run/redis/redis-server.sock auth PleaseChange FLUSHALL quit sudo -u www-data php /var/www/nextcloud/occ files:scan --all -v sudo -u www-data php /var/www/nextcloud/occ files:scan-app-data -v systemctl start php8.3-fpm.service nginx.service
After the successful reconstruction of the Nextcloud index

The data is already available to you using the NFS shares. If you plan to edit the data both through Nextcloud and directly via the share, you should set the parameter
filesystem_check_changes' => 1,'
set in the config.php. This ensures that regardless of where the data was last edited, the Nextcloud file app is always synchronized with the NFS (i.e., current).
Assume that the new hard drive can be mounted under ‘/dev/sda‘ for Nextcloud. We format this HDD/SSD with the file system ‘ext4’ and mount it persistently on the system (/etc/fstab). Let's get started and first stop the Nextcloud server:
systemctl stop nginx.service php8.3-fpm.service redis-server.service mysql.service stop
Now we check the availability of the new drive on the server
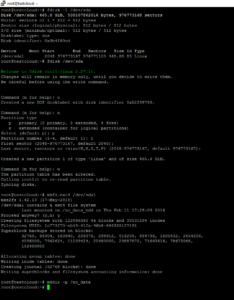
fdisk -l
and partition it as follows (Assumption: The new hard drive is available under /dev/sda):
fdisk /dev/sda
- Choose ‘o’ to create a new partition table
- Choose ‘n’ to create a new partition
- Choose ‘p’ (primary partition type), thus a primary partition
- Choose the partition number: 1
- Further inputs can be accepted by pressing the ENTER key without further specifications, thus with the default values <Enter>
- Write the configuration: ‘w’ and press <ENTER>
The new partition ‘/dev/sda1’ has already been created and just needs to be formatted:
mkfs.ext4 /dev/sda1 fdisk -s /dev/sda1
Now we create a new directory ‘/nc_data’ and mount the new partition ‘/dev/sda1’:
mkdir -p /nc_data chown -R www-data:www-data /nc_data
The persistent mounting is done in the fstab:
cp /etc/fstab /etc/fstab.hd.bak nano /etc/fstab
Add the following line at the end:
/dev/sda1 /nc_data ext4 defaults 0 1
Now we execute the following command to mount the drive:
'mount -a'
A look into the file system already shows us the new disk in the system:
df -Th
Now we will transfer the inventory data to the new directory (Assumption: Your Nextcloud data was previously located under /var/nc_data):
rsync -av /var/nc_data/ /nc_data
and adjust the Nextcloud config.php regarding the new data directory:
sudo -u www-data nano /var/www/nextcloud/config/config.php
Change it as follows:
'datadirectory' =>'/nc_data',
Finally, we restart the previously completed services and perform an indexing run:
systemctl start mysql.service php8.3-fpm.service redis-server.service
cd /var/www/nextcloud
redis-cli -s /var/run/redis/redis-server.sock FLUSHALL auth PleaseChange quit
sudo -u www-data php occ files:scan --all -v sudo -u www-data php occ files:scan-app-data -v
systemctl restart php8.3-fpm.service nginx.service
From now on, the entire capacity of the new hard drive is available for your Nextcloud.
Note: If the data from the previous directory has been successfully copied, the source directory can be deleted finally:
rm -Rf /var/nc_data/
In addition to the chapters 10.1 and 10.2, the Nextcloud storage can also be expanded using the Nextcloud own app "external storage".
This makes it possible to access various storage media without complications:
- Files can be recreated, edited, and deleted "out-of-the-box" – both within and outside of Nextcloud, and are always kept in sync,
- You can provide additional drives and shares as extra Nextcloud storage,
- You can allow users to use their own devices as external storage,
- …
Further documentation on this app can be found here.
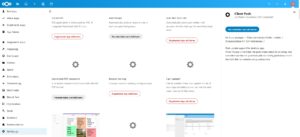
We start with the setup of the High Performance Backend for files and switch to the Nextcloud App Store for that. In the category Tools you can find the app Client Push.
Alternatively, you can also install the app via the command line:
sudo -u www-data php /var/www/nextcloud/occ app:enable notify_push
After installation and activation via the App Store, the activities in the Nextcloud interface are already completed. Next, we proceed here on the server's command line. First, the virtual host for Nextcloud needs a small extension.
nano /etc/nginx/conf.d/nextcloud.conf
At the end of the file, we add the red lines (» codeberg: https://codeberg.org/criegerde/nextcloud/raw/branch/master/etc/nginx/conf.d/nextcloud-mit-push.conf):
[...] location / { try_files $uri $uri/ /index.php$request_uri; } location ^~ /push/ { proxy_pass http://127.0.0.1:7867/; proxy_http_version 1.1; proxy_set_header Upgrade $http_upgrade; proxy_set_header Connection "Upgrade"; proxy_set_header Host $host; proxy_set_header X-Forwarded-For $proxy_add_x_forwarded_for; } }
Restart the web server:
systemctl restart nginx.service
The setup of the high performance backend for files is then called via OCC:
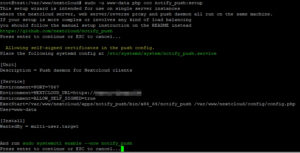
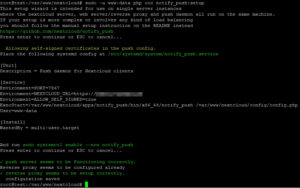
cd /var/www/nextcloud sudo -u www-data php occ notify_push:setup
If the configuration is valid, further instructions will be displayed to create a systemd unit for the Nextcloud High Performance Backend for files.
For this, we open another, additional SSH session and create the service:
nano /etc/systemd/system/notify_push.service
[Unit]
Description = Push daemon for Nextcloud clients
After=nginx.service php8.3-fpm.service mariadb.service redis-server.service [Service]
Environment=PORT=7867
Environment=NEXTCLOUD_URL=https://ihre.domain.de
ExecStart=/var/www/nextcloud/apps/notify_push/bin/x86_64/notify_push /var/www/nextcloud/config/config.php
User=www-data
[Install]
WantedBy = multi-user.target
The service will then be activated and started:
systemctl daemon-reload systemctl enable --now notify_push
Provided that the service has been started correctly
let's switch back to the first SSH session and confirm the dialog with ENTER:
If app updates come, a service restart will be needed.
systemctl restart notify_push.service
You can verify the configuration as follows:
sudo -u www-data php occ notify_push:setup https://your.domain.com/push
To check the functionality of the Nextcloud HPB for files, download the Nextcloud "test_client".
wget -O test_client -q https://github.com/nextcloud/notify_push/releases/download/v0.6.11/test_client-x86_64-unknown-linux-musl
and start this followed by your domain, the user, and the corresponding password. If 2FA is already active, use an app password.
chmod +x test_client ./test_client https://<your.domain.de> <Nextcloud-Username> <(App-)Password>
and upload, for example, a file to your cloud.
Then, if you see activities in the Nextcloud test_client tool, the Nextcloud HPB for files works. After your tests, delete the client to avoid later issues when updating Nextcloud.
rm -f test_client
The setup of the High Performance Backend for files has been successfully completed.
Adjust the file /root/bash_aliases to be able to start the Nextcloud toolset occ directly using nocc.
Ubuntu
if [ ! -f /root/.bash_aliases ]; then touch /root/.bash_aliases; ficat <<EOF >> /root/.bash_aliasesalias nocc="sudo -u www-data php /var/www/nextcloud/occ"
EOF
source /root/.bash_aliases
Debian
if [ ! -f /root/.bashrc ]; then touch /root/.bashrc; ficat <<EOF >> /root/.bashrcalias nocc="sudo -u www-data /usr/bin/php /var/www/nextcloud/occ"
EOF
source /root/.bashrc
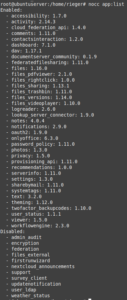
From now on, you as a privileged user (sudo -s) can directly execute the Nextcloud occ tools via "nocc ...", e.g.:
nocc app:list
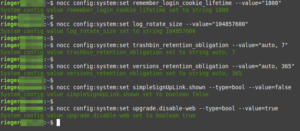
to display all activated and deactivated apps of your Nexctloud, for example. We recommend setting the following settings:
nocc config:system:set remember_login_cookie_lifetime --value="1800" nocc config:system:set log_rotate_size --value="104857600" nocc config:system:set trashbin_retention_obligation --value="auto, 7" nocc config:system:set versions_retention_obligation --value="auto, 365" nocc config:system:set simpleSignUpLink.shown --type=bool --value=false nocc config:system:set upgrade.disable-web --type=bool --value=true nocc config:app:set text workspace_available --value=0 nocc config:system:set loglevel --value="2" nocc config:app:set settings profile_enabled_by_default --value="0" nocc app:enable admin_audit nocc config:app:set admin_audit logfile --value="/var/log/nextcloud/audit.log" nocc config:system:set log.condition apps 0 --value admin_audit
Set chunk size or disable with '0'
nocc config:app:set files max_chunk_size --value="104857600"
oder
nocc config:app:set files max_chunk_size --value 0
A further overview of Nextcloud settings can be found here.
To set up manual log rotation, e.g. for the nextcloud.log and audit.log files, proceed as follows:
sed -i '/log_rotate_size/d' /var/www/nextcloud/config/config.phpnocc config:system:set log_rotate_size --value="0"
nano /etc/logrotate.d/nextcloud-audit
Add all the following, save and then exit this file:
/var/log/nextcloud/*.log { su root adm size 100M missingok rotate 30 compress delaycompress notifempty sharedscripts }
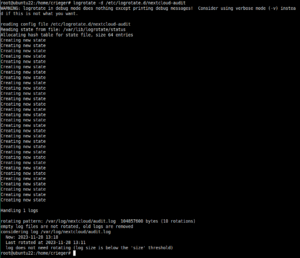
To test or initially execute the log rotating, you can use the following commands:
logrotate -d /etc/logrotate.d/nextcloud-audit
logrotate --force /etc/logrotate.d/nextcloud-audit
The installation and securing of your Nextcloud server has been successfully completed, and I wish you a lot of fun with your data in your private cloud. My wife, my twins, and I would be very happy about your support (this will be properly taxed!)
