A while ago I wrote a detailed post on how to install tails and be able to use its persistence features. I didn't plan to write more about this distribution, but today I was listening to the podcast of the linux crab and it was said that this distribution does not allow installing software with persistence and the truth is that this is not entirely true. If you want to install software permanently on tails and avoid having to install it every time we open the computer, we can do it as follows.
INSTALLING PROGRAMS WITH PERSISTENCE IN TAILS
To install software permanently or persistently on Tails, we need to follow these steps.
Ensure that we have persistence enabled
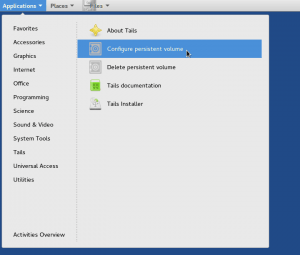
The first thing we need to do is ensure that we have persistence enabled and properly configured. To do this, as can be seen in the screenshot, we go to the Applications menu, within the Applications menu we access the Tails submenu and finally we click on the Configure persistent volume option.
Once we have accessed the persistence settings, as can be seen in the screenshot, we need to ensure that the APT packages and APT Lists persistence options are enabled.
If they are not activated, we have to activate them. The function that these 2 characteristics of persistence perform is as follows:
APT Packages: By enabling this option, every time we install a program with apt-get or synaptic, the downloaded .deb binary packages will be persistently saved to our USB stick. This is essential because every time we boot Tails, the .deb packages stored in the persistence space will be automatically used to install the software we want.
APT Lists: By enabling the APT Lists option, we will store the downloaded information in the persistence space when we use the apt-get update command. This way, when we boot Tails, the package list contained in each repository will be updated.
Note: In case you do not have persistence enabled, I recommend that you follow the instructions mentioned in the following post.
Install the program that we want to be persistent
Once persistence is activated we can now install the software we want to be persistent. In my case, as an example, I will install the shutter software. To install it we just have to follow the following steps:
To update the distribution repositories we run the following command in the terminal:
sudo apt-get update
Finally, to install the program we run the following command in the terminal:
sudo apt-get install shutter
Once the commands are executed, the program will be installed and we will be able to use it without any major issues. Additionally, in the persistence space of our USB memory, all the packages used to install Shutter will be stored. This way, the next time Tails is booted, this information will be used to install Shutter automatically without us having to do anything.
Make the installed program persistent
Once persistence is activated and the software we want to make persistent is installed, we open a terminal and execute the following command:
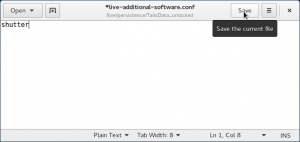
sudo gedit /live/persistence/TailsData_unlocked/live-additional-software.conf
Once the command is executed, the gedit text editor will open in which, as can be seen in the screenshot, we must write the name of the package/program that we want to be installed every time we boot tails. In my case, as can be seen in the screenshot, I write Shutter which is the package that I just installed.
Once the name of the program is written we save the changes and close the file. From now on, every time Tails is started, Shutter will be installed automatically without you having to do anything at all. Therefore, with this method, we are not installing the program persistently, but for practical purposes, it is as if we were doing it because when starting Tails, Shutter is installed automatically without you having to do anything.


